Let's Design and Build a (mostly) Digital Theremin!

Posted: 9/29/2021 3:44:12 PM
dewster

From: Northern NJ, USA

Joined: 2/17/2012

Last Of The Red Hot Soldering

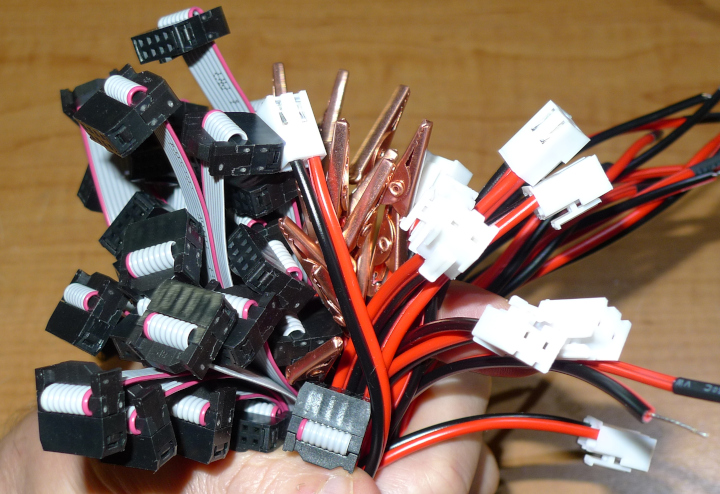
Discovered I had just enough wire and connectors to finish the kit cabling:

Above: A Fistfull Of Cables.  AFE on left, antenna clip in center, power/ground on right.

Just waiting for another reel of Army green PETG, Amazon says Friday.  Need to get on the stick and order some shipping boxes.

Posted: 10/4/2021 8:57:53 PM
Mr_Dham

From: Occitanie

Joined: 3/4/2012

Tu tiens le bon bout !

(French idiom for "you're on the right track" - litteraly "you hold the right strand of cable" )

Posted: 10/5/2021 2:10:05 AM
dewster

From: Northern NJ, USA

Joined: 2/17/2012

"Tu tiens le bon bout ! "  - Mr_Dham

Ha ha!  So appropriate...  My only encounter with the word "bout" has been with guitars (upper & lower bouts, separated by the waist).

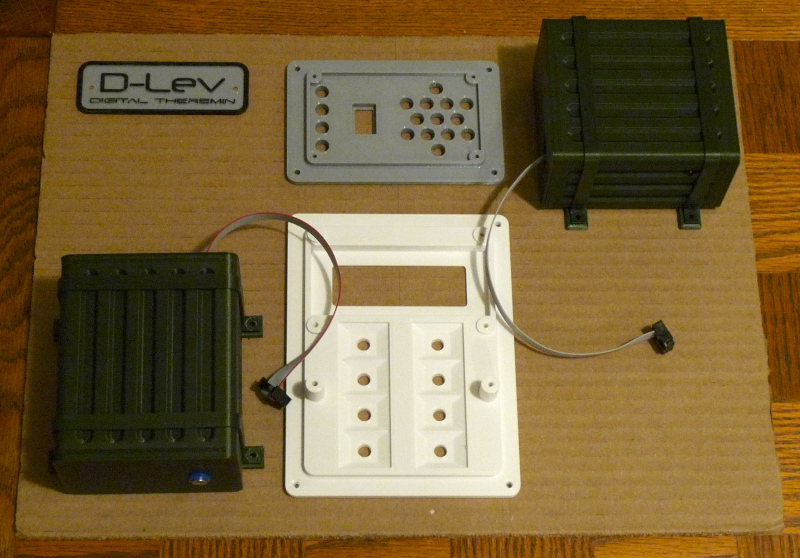
The kit soldering is past (I added some clips for convenient grounding to the above cables) and now I'm working on packaging the parts for shipment and subsequent play.  Ordered & received 25 16" x 12" x 6" cardboard boxes that will do I think.  Also received 50 16" x 12" cardboard sheets to use for reinforcement, and to mount the components:

Above is the layout I'll probably go with.  The volume AFE box points down, the pitch AFE box points to the right, so the coils are at right angles to each other, and physically separated about as far as possible from each other.  The control and tuner plates are scraps, and upside down here to sit flat for illustration purposes.  I had to design and print straps for the AFE boxes so that I could mount them (total afterthought) and am printing a bunch as I type this.  The SPDIF DAC box will be at the lower right blank area, probably underneath.  It's all a bit wider than I would like, the 16" x 12" form factor turned 90 degrees would be better, but the components wouldn't fit so well in the given volume.  I hate to get folks off on a sligtly wrong foot ergonomics-wise, but the choices were rather limited, and extra space is needed for shipping cushioning.

Also received a GIANT double roll of pink anti-static bubble wrap - shipping & handling 'R Us!

Posted: 10/8/2021 3:07:54 AM
dewster

From: Northern NJ, USA

Joined: 2/17/2012

Detailing

The last time Jeff (ContraDude) was visiting, I was complaining to him about the radiating rings in the logo mushing together with the dash.  He suggested I put some space between them, which I tried today using the "offset" function in OpenSCAD:


I wasn't aware offset could be applied to a font, but it can, as to any 2D object.  So the font is "fattened up" and subtracted from the rings to give the gap.  This is the improvement I was searching in vain for.

Jeff also suggested the Mute knob operate in the opposite direction, which makes sense, and was bothering me as the center tuner LED was now the opposite of the mute LED.  I ended up renaming Mute "On" so that CW would turn on the audio (and the center LED) and CCW would turn off the audio.  Much more consistent now and minimally surprising.

Thank you for your highly useful ideas Jeff!  Two heads really are better than one (particularly when the one is mine)!  And big thanks to Roger (pitts8rh) for creating the logo!  Once your project has a logo and a manual you're cooking with gas!

Posted: 10/9/2021 5:01:24 PM
dewster

From: Northern NJ, USA

Joined: 2/17/2012

Simplified Field Setup Instructions

The D-Lev field adjustments can be daunting at first, as there are many more options than Thereminists are usually presented with.  So I made some pitch field setup images that will end up in the manual, and would like to present them here first.  The pitch field knobs are presented in the order they should be adjusted, but the following applies equally to the volume field as the knobs and internal processing are virtually identical.  Captions are beneath the images.
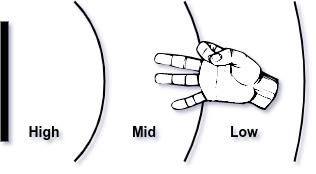

The goal: high, mid, and low pitch sections equally sized and correctly located in the pitch field.


Left: The Pcal knob is set too low, compressing the lower pitch sections.  Right: The Pcal knob is set too high, expanding the lower pitch sections.

The Pcal knob is just like the pitch null knob on an analog Theremin, and so is naturally the most critical adjustment in terms of field linearity.  It affects the far field the most, the mid field some, and the near field very little.  To set Pcal, compare open/closed hand gestures in the near and far fields, and adjust Pcal until you get the same number of note steps on the LED tuner.

When you perform an ACAL, an internal offset is calculated and combined with Pcal - and Pcal is the only input influenced by the ACAL process!


Left: A lower setting of the Sens knob.  Right: A higher setting of the Sens knob. 

The Sens knob controls the sensitivity, or overall note spacing of the field.  Adjust the knob until you feel comfortable with the note spacing, which you can observe directly on the LED tuner.  In particular, if you have played an analog Theremin for a long time and have developed an elaborate fingering technique, appropriate adjustment of the Sens knob will enable you to more quickly adapt to the D-Lev pitch field.


Left: The Ofs+ knob is set too low, shifting all pitches too close to the antenna.  Right: The Ofs+ knob is set too high, shifting them too far away.

The Ofs+ knob shifts the entire pitch field.  If you find yourself reaching for the oct knob and consistently turning it in one direction a lot, you should instead adjust the Ofs+ knob to better locate the pitches in the field.  Proper adjustment of this knob will also help you to feel more comfortable playing the D-Lev. 

Keep in mind that the near field is the "sweet spot" in terms of responding mainly to your hand capacitance, and less to your body's capacitance as well as to other external interference.  This region is also the least dependent on Pcal and the ACAL process.  And on the D-Lev this region isn't non-linear like on most analog Theremins.  For all of these reasons I recommend you set up the pitch field so that you generally play nearer to the pitch antenna than farther from it.  Not as sexy to watch unfortunately, but you will have better pitch control.

(For simplicity, the Lin and Ofs- knobs weren't discussed here.  Please see their descriptions - as well as more detailed field setup instructions - in the manual.)
Posted: 10/13/2021 9:02:34 PM
Mr_Dham

From: Occitanie

Joined: 3/4/2012

Maybe just one small thing:


Left: The Pcal knob is set too low, compressing the lower pitch sections.  Right: The Pcal knob is set too high, expanding the lower pitch sections.

It is not so obvious in the two drawings that the field is not linear. It would probably worth exaggerating the difference between close and far field.
(even though drawings are probably quite close to real case)

Posted: 10/13/2021 9:43:00 PM
dewster

From: Northern NJ, USA

Joined: 2/17/2012

Yah, I agree, somewhat vague.  I didn't want to change the High section much because it barely changes with null, but that doesn't leave a lot of room to change the others both bigger and smaller.  I can maybe bunch the two situations together a little more and gain more obvious difference room:


Thanks for that observation!

Posted: 10/18/2021 5:49:08 PM
dewster

From: Northern NJ, USA

Joined: 2/17/2012

I Need A Guide To Show Me The Way (Lead Me On)

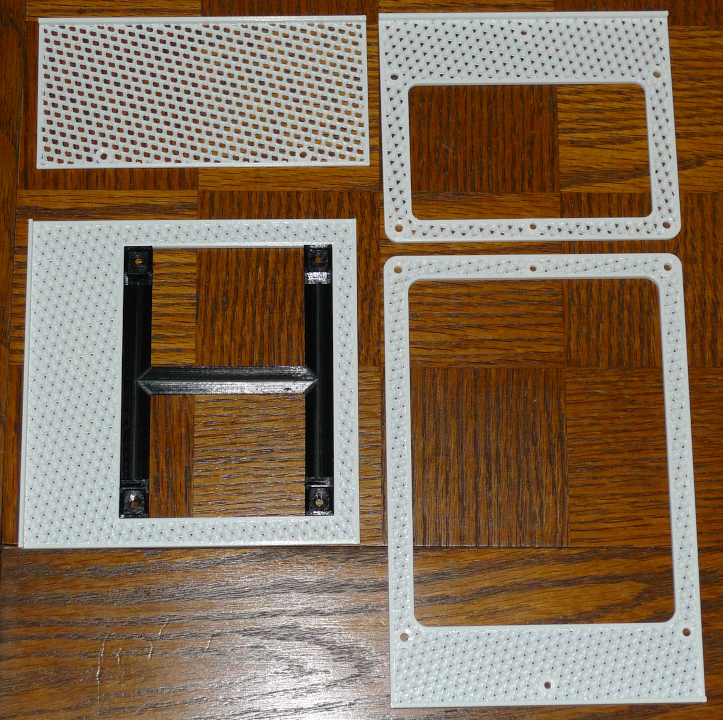
I decided the corrugated cardboard to mount all the kit components on was just too sleazy, so I trucked out to Home Despot and got some of that corrugated plastic sheet.  When you make 10 of anything it helps to do things in batched steps, which can greatly benefit from stencils and such, so I designed and 3D printed drilling and hole cutting guides for each sub-assembly.

Above: I removed top and bottom skins in the Prusa slicer to minimize plastic use, and specified 4 inner & outer skins with 30% cubic infill.  On the tuner and control panel I stuck some centerline peeping holes too.  There's a thin rail that aligns each guide to the edge of the corrugated plastic.  For the AFE & coil base I just cut a hole to hold the real deal and let it do all the work.

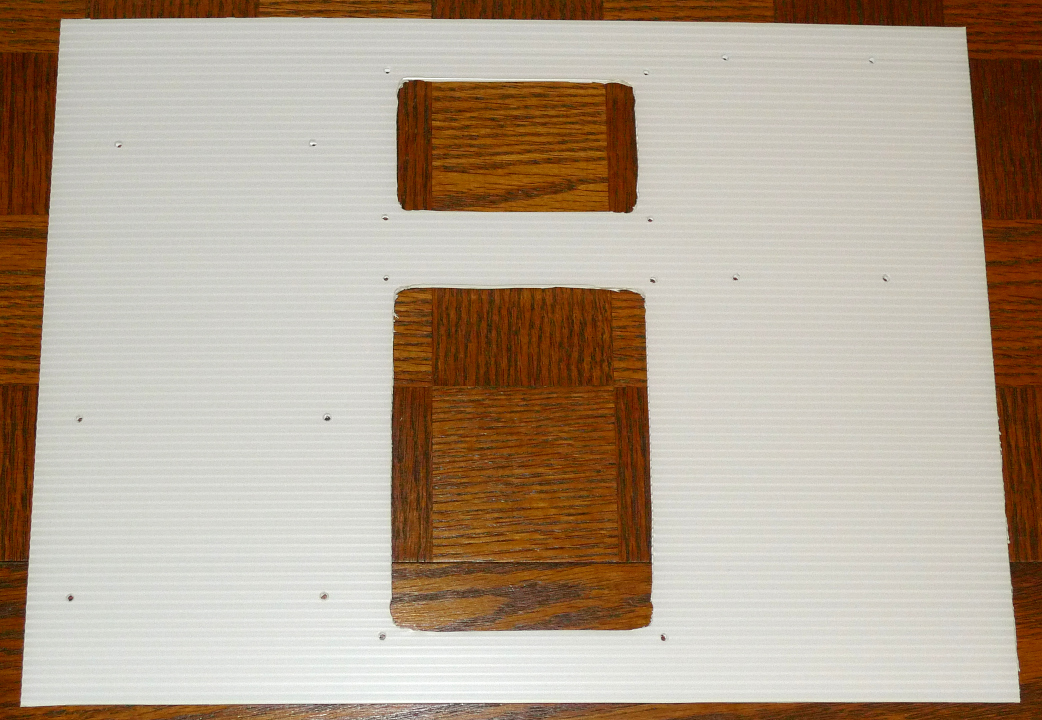
Above: the guides are sitting on the rear side of a 300mm x 400mm x 4mm sheet of white corrugated plastic.  Only had to draw one vertical center line, then went to town with pencil and guides.

Above: I used a soldering iron to "drill" the M3 holes, and a large soldering iron type thing to do the corner radii (it's meant to poke holes in printer toner carts for refilling them).  Like a hot knife through butter!  There's a little clean up afterward with a single edge razor blade, but the whole thing takes like 10 minutes.  Kinda stinky though.

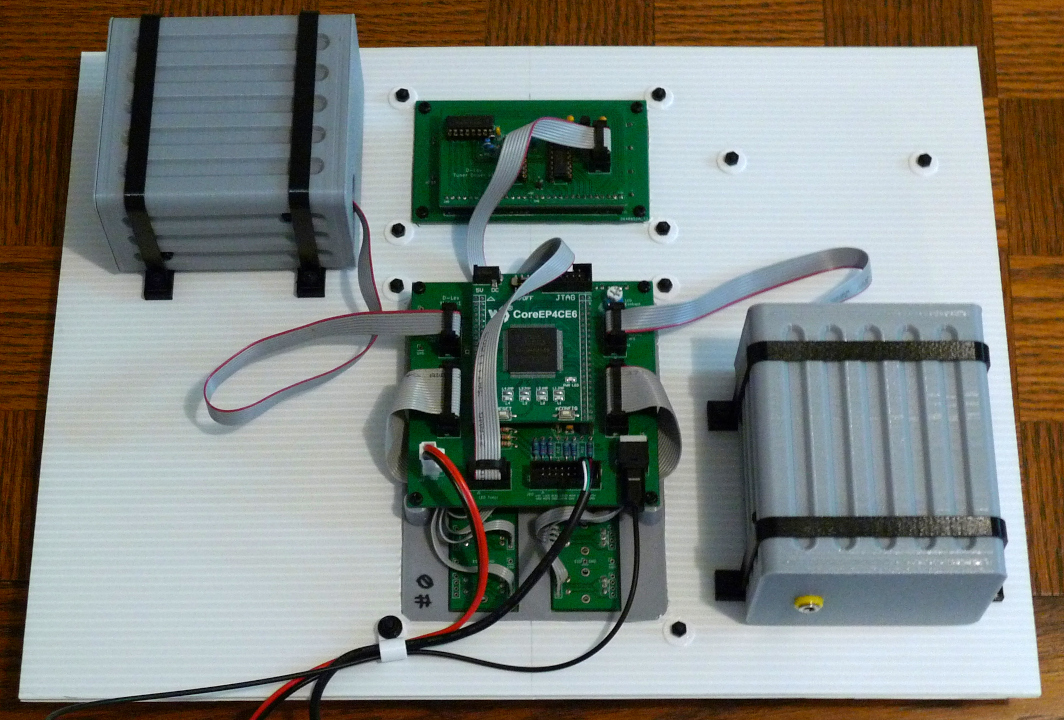
Above: Sub-assemblies assembled on the back of the board.  Everything you see here except for the nylon M3 screws & nuts and PCBs was designed and 3D printed by me (PETG) including the washers and wire clamp.  Since this is patient zero (my unit) I used some gray AFE & coil boxes from my junk box, everyone else is getting Army green boxes.

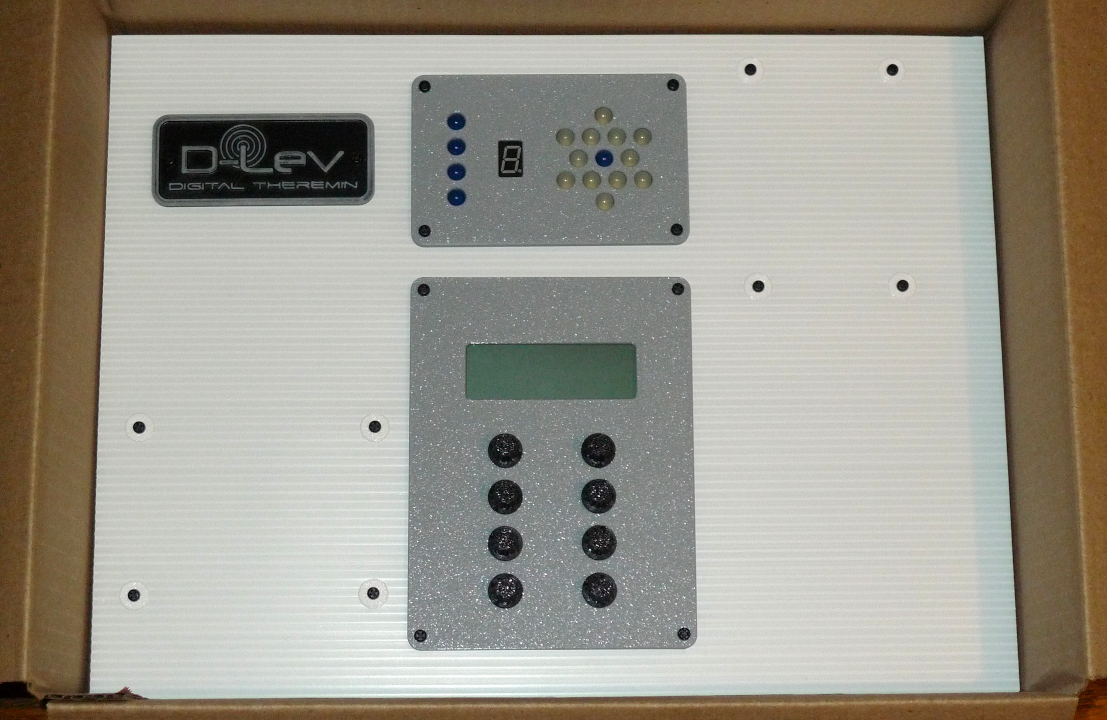
Above: The finished kit resting comfortably in its shipping box, waiting to greet its new owner (me!).  Pay no attention to the awful logo plate, it's just a place holder, and I'm hoping the next batch will turn out better.

On the positive side I'm running out of excuses not to finish the kits - on the negative side I'm running out of excuses not to finish the kits! ;-)

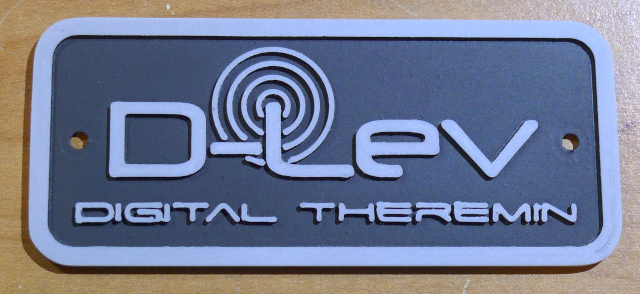
[EDIT] Ah, this logo plate came out pretty good (it looks better in person):

I'm still learning how to do this.  Print in light gray PETG, seal the very top as it is more porous then you might imagine, flat light gray spray primer, flat black spray paint.  Sand face with 3D printed fixture.  I tried a satin clear coat on the previous batch and it made everything look 10x worse.  I may try a matte clear coat on these, though every layer you spray on is one more chance for dust particles to make a mess of things.

Posted: 10/18/2021 10:43:09 PM
ContraDude

From: Basking Ridge, New Jersey, USA

Joined: 12/12/2020

Whew! I’ve had an extremely busy music schedule (unrelated to the theremin) these past few weeks and other that practicing, haven’t had much time for much else other than lurking on TW. While my Claravox still works well (after Dewster helped fix it), I continue to consider the D-Lev as my favorite instrument and spend most of my time playing it. Anyway, in response to several of Dewster’s previous threads:


dewster > “Jeff also suggested the Mute knob operate in the opposite direction, which makes sense, and was bothering me as the center tuner LED was now the opposite of the mute LED.  I ended up renaming Mute "On" so that CW would turn on the audio (and the center LED) and CCW would turn off the audio.  Much more consistent now and minimally surprising.

“Thank you for your highly useful ideas Jeff!  Two heads really are better than one (particularly when the one is mine)!  And big thanks to Roger (pitts8rh) for creating the logo!  Once your project has a logo and a manual you're cooking with gas!” 

Thank you, Eric! I very much like the very minor changes you’ve made but they are helpful to me. I like what you’ve done with the logo but still ache for my D-Lev (serial #00000000001) to be the “Quasquicentennial” edition! LOL!!!

Regarding the “Simplified Field Setup Instructions,” I very much like the graphics! They make the instructions for the initial setup of both the pitch and volume antennas more understandable. The D-Lev is a sophisticated instrument and has MANY MORE customizable parameters than the CVox, all of which can be changed using the encoders and viewed onboard via the LCD panel. Most of these, as you’ve previously told me, seldom, if ever, need to be changed once to D-Lev is setup for each individual’s preferences. The field setup parameters are, arguably, some of the most critical to adjust initially and make a world of difference in how the D-Lev responds. As noted, the vast majority of the available parameters don’t need to be adjusted after they  have been established and stored on the instrument. Unlike the CVox, the D-Lev is considerably more stable with regard to linearity, zero beat, etc.; antenna calibration is MUCH easier on the D-Lev and takes an entire second to complete.

The kits are looking great and the latest version of the logo also looks cool. Given that you’re a “one-man show,” what you’ve done is very cool and, frankly, amazing. While my Instrument is still the “Bollamin” (gotta admit, it does give my instrument a lot of “character”), I’m starting to contemplate a more permanent enclosure. Just the same, I really love my D-Lev!


Posted: 10/19/2021 2:24:18 AM
dewster

From: Northern NJ, USA

Joined: 2/17/2012

"I like what you’ve done with the logo but still ache for my D-Lev (serial #00000000001) to be the “Quasquicentennial” edition! LOL!!!"  - ContraDude

Oh, that can be arranged!  Scaling the plate up a bit would allow the necessarily tinier font to come out OK.

"Regarding the “Simplified Field Setup Instructions,” I very much like the graphics!"

Thanks!  I've been meaning to do that for a while now, words can only say so much.

"The D-Lev is a sophisticated instrument and has MANY MORE customizable parameters than the CVox, all of which can be changed using the encoders and viewed onboard via the LCD panel. Most of these, as you’ve previously told me, seldom, if ever, need to be changed once to D-Lev is setup for each individual’s preferences. The field setup parameters are, arguably, some of the most critical to adjust initially and make a world of difference in how the D-Lev responds."

Yes, you've helped me realize that getting the fields right for the individual is absolutely job #1.  And it's been my experience too that once they are set up, only a very occasional Pcal adjustment is necessary (beyond the ACAL process).

The Claravox would really benefit from even a $1 single line LCD!  Maybe they thought it was too non-traditional?  But there's a processor in there...

"Unlike the CVox, the D-Lev is considerably more stable with regard to linearity, zero beat, etc.; antenna calibration is MUCH easier on the D-Lev and takes an entire second to complete."

The Cvox calibration process seem to have inherited perhaps too much from the Theremini, one of those things that sounds good on paper and looks good in a meeting...

"While my Instrument is still the “Bollamin” (gotta admit, it does give my instrument a lot of “character”), I’m starting to contemplate a more permanent enclosure. Just the same, I really love my D-Lev!"

I'm extremely gratified that it's hanging in there in your estimation.  We (along with the other kit owners) should collaborate on a standardized enclosure!

You must be logged in to post a reply. Please log in or register for a new account.